MySql Stored Procedure Example Simple

Stored Procedure che mostra l’utilizzo di dichiarazione variabili, cursori annidati, ciclo while, if then.

CREATE  PROCEDURE `updateOffer`()
BEGIN
 declare v_col2 int default 0;
 declare no_more_rows2 int default 0;
DECLARE finito INT default 0;
DECLARE OrderItemID INT;
DECLARE userId INT;
DECLARE example_cursor CURSOR FOR select id from imps_customer_tb;
DECLARE CONTINUE HANDLER FOR NOT FOUND SET finito = 1;

  — open the cursor
OPEN example_cursor;
  ciclo: WHILE NOT finito DO
       — read the name from next row into the variable l_name
  FETCH  example_cursor INTO   userId;

                 INSERT INTO imps_offer_tb (`PROG_ANNO`, `EMISSION_DATE`, `DIVISION_ID`, `CUSTOMER_ID`, `CREATION_DATE`, `LAST_UPDATE_DATE`, `STATO_ID`, `TOTAL_AMOUNT`,`PRIMARIA`) VALUES (1, ‘2013-11-28’, 1, userId, ‘2013-11-28 17:03:25’, ‘2013-11-28 17:03:26′, 1, 0,’y’);
    set OrderItemID = LAST_INSERT_ID();

BLOCK2: begin
declare v_col2 int;
declare no_more_rows2 INT default 0;
  declare cursor2 cursor for    select distinct of.id from imps_course_tb of, imps_offer_tb o   WHERE    o.CUSTOMER_ID = userId and of.OFFER_ID = o.ID ;
    declare continue handler for not found   set no_more_rows2 = 1;
    open cursor2;
            LOOP2: WHILE NOT no_more_rows2 DO
                fetch cursor2 into  v_col2;
                          if v_col2 <> 0 then
         UPDATE `imps_course_tb` SET `OFFER_ID`=OrderItemID  WHERE  `ID`=v_col2;
                          end if;
            END WHILE  LOOP2;
            CLOSE cursor2;
       end BLOCK2;

        END WHILE ciclo;
CLOSE example_cursor;

END

Ottimo debug per mysql:
http://mydebugger.com/

f:ajax tag JSF 2.0

f:ajax è un tag JSF che aggiunge il meccanismo delle request asincrone a molti componenti UI. 

pagina con supporto ajax:


ProvaAjax.xhmtl

<?xml version=”1.0″ encoding=”UTF-8″?>
<!DOCTYPE html PUBLIC “-//W3C//DTD XHTML 1.0 Transitional//EN” 
“http://www.w3.org/TR/xhtml1/DTD/xhtml1-transitional.dtd”>
<html xmlns=”http://www.w3.org/1999/xhtml”
      xmlns:f=”http://java.sun.com/jsf/core”      
      xmlns:h=”http://java.sun.com/jsf/html”>

    <h:body>
    <h3>JSF 2.0 + Ajax Hello World Example</h3>

    <h:form>
      <h:inputText id=”name” value=”#{provaTag.name}” ></h:inputText>
      <h:commandButton value=”Try Me” >
    <f:ajax execute=”name” render=”output” listener=”#{provaTag.handleEvent}” />
      </h:commandButton>

      <h2><h:outputText id=”output” value=”#{provaTag.message}” /></h2>
    </h:form>

    </h:body>
</html>

nel tag f:ajax:
            – execute=”name”, indica che il componente con id “name” deve essere mandato al server.
            – render=”output”, indica che il componente con id “output” dovrà, dopo la request ajax, essere aggiornato.
            – listener=“#{provaTag.handleEvent}”, indica il metodo del bean da chiamare.

ProvaTag.java

package com;

import javax.faces.bean.ManagedBean;
import javax.faces.bean.SessionScoped;
import javax.faces.event.AjaxBehaviorEvent;

import java.io.Serializable;

@ManagedBean
@SessionScoped
public class ProvaTag implements Serializable {

private static final long serialVersionUID = 1L;

private String name;
private String message;

public String getName() {
  return name;
}

public void setName(String name) {
this.name = name;
}

public String getMessage(){
return message;
}

public void setMessage(String message) {
this.message = message;
}

public void handleEvent(AjaxBehaviorEvent event) {
       message = “Hello World:”+ name;
   }
 
}


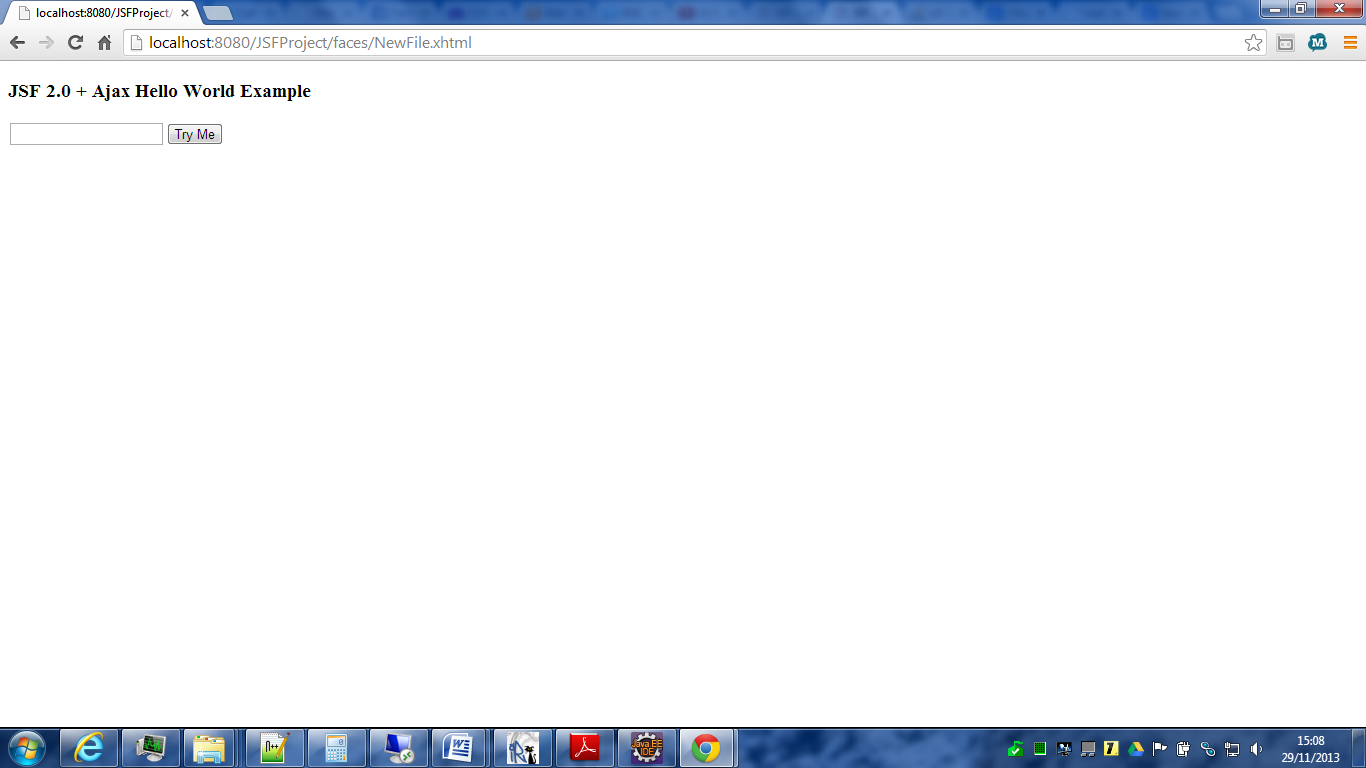
risultato:


cliccando sul tasto “Try Me”:


How To Create New File

import java.io.*;

public class CreateFile{
  public static void main(String[] args) throws IOException{
  File f;
  f=new File(“myfile.txt”);
  if(!f.exists()){
  f.createNewFile();
  System.out.println(“New file “myfile.txt” has been created
  to the current directory”);
  }
  }
}

Spring 3, get file properties from source with @Value

Creare un file di properties dentro la cartella resources:

configurationFBM.properties

prova= bohhhh

Modificare il file di configurazione di spring:

<beans xmlns:context=”http://www.springframework.org/schema/context” xmlns:util=”http://www.springframework.org/schema/util” xmlns:xsi=”http://www.w3.org/2001/XMLSchema-instance” xmlns=”http://www.springframework.org/schema/beans” xsi:schemalocation=”http://www.springframework.org/schema/beans
http://www.springframework.org/schema/beans/spring-beans-3.1.xsd
http://www.springframework.org/schema/context
http://www.springframework.org/schema/context/spring-context-3.1.xsd
http://www.springframework.org/schema/beans http://www.springframework.org/schema/beans/spring-beans-3.0.xsd
    http://www.springframework.org/schema/util http://www.springframework.org/schema/util/spring-util-3.0.xsd”>

<context:component-scan base-package=”com.fbm”>
       <util:properties id=”configurationFBM” location=”classpath:/configurationFBM.properties”>

</util:properties></context:component-scan></beans>

Da dentro il codice si può accedere ad una proprietà del file di properties con la seguente annotation:

@Value(“#{configurationFBM[‘prova’]}”)
String someValue;

Install Spring 3 With Jar

Creare un file pom.xml cosi composto:

<project xmlns=”http://maven.apache.org/POM/4.0.0″ xmlns:xsi=”http://www.w3.org/2001/XMLSchema-instance” xsi:schemaLocation=”http://maven.apache.org/POM/4.0.0 http://maven.apache.org/xsd/maven-4.0.0.xsd”>
  <modelVersion>4.0.0</modelVersion>
  <groupId>spring-source-download</groupId>
  <artifactId>SpringDependencies</artifactId>
  <version>1.0</version>
  <properties>
    <project.build.sourceEncoding>UTF-8</project.build.sourceEncoding>
  </properties>
  <dependencies>
    <dependency>
        <groupId>org.springframework</groupId>
        <artifactId>spring-context</artifactId>
        <version>3.2.5.RELEASE</version>
    </dependency>
<dependency>
<groupId>org.springframework</groupId>
<artifactId>spring-web</artifactId>
<version>3.0.5.RELEASE</version>
</dependency>
  </dependencies>
  <build>
    <plugins>
      <plugin>
        <groupId>org.apache.maven.plugins</groupId>
          <artifactId>maven-dependency-plugin</artifactId>
            <version>2.8</version>
            <executions>
              <execution>
                <id>download-dependencies</id>
                  <phase>generate-resources</phase>
                    <goals>
                      <goal>copy-dependencies</goal>
                    </goals>
                    <configuration>
                      <outputDirectory> ${project.build.directory}/dependencies </outputDirectory>
                    </configuration>
              </execution>
            </executions>
      </plugin>
    </plugins>
  </build>
</project>

cliccare con il tasto destro sopra il file e selezionare “install”.
Dentro la cartella target/dependencies ci saranno tuti i jar di Spring 3.

How To Write To File In Java with BufferedWriter

BufferedWriter è una classe per gestire uno  Stream dati di tipo carattere.

package com;
 
import java.io.BufferedWriter;
import java.io.File;
import java.io.FileWriter;
import java.io.IOException;
 
public class WriteToFileExample {
 public static void main(String[] args) {
  try {
 
   String content = "bla bla bla";
 
   File file = new File("/prova/filename.txt");
 
   // if file doesnt exists, then create it
   if (!file.exists()) {
    file.createNewFile();
   }
 
   FileWriter fw = new FileWriter(file.getAbsoluteFile());
   BufferedWriter bw = new BufferedWriter(fw);
   bw.write(content);
   bw.close();
 
   System.out.println("Done");
 
  } catch (IOException e) {
   e.printStackTrace();
  }
 }
}

p:lightBox PrimeFaces JSF2 With Dynamic Images

p:lightBox mostra una sequenza di foto.

Creare una cartella Web-Inf/resources/images con  una immagine chiamata photoProfile.png

Creare i seguenti file:
Photo.java

package com;

public class Photo {

private String img;
private String position;


public Photo() {
super();
// TODO Auto-generated constructor stub
}

public Photo(String img, String position) {
super();
this.img = img;
this.position = position;
}


public String getImg() {
return img;
}

public void setImg(String img) {
this.img = img;
}

public String getPosition() {
return position;
}
public void setPosition(String position) {
this.position = position;
}
}

GalleriaBean.java

package com;

import java.util.ArrayList;
import java.util.List;
import javax.annotation.PostConstruct;
import javax.faces.bean.ManagedBean;
import javax.faces.bean.SessionScoped;

@ManagedBean
@SessionScoped
public class GalleriaBean {

    private List<Photo> images;

    private Photo selectedPlayer;

    @PostConstruct
    public void init() {
        images = new ArrayList<Photo>();

        for(int i=1;i<=12;i++) {
        Photo photo = new Photo();
        photo.setImg(“/resources/images/photoProfile.png”);
        photo.setPosition(“http://localhost:8080/JSFProject/resources/images/photoProfile.png”);
            images.add(photo);
        }

    }

    public Photo getSelectedPlayer() {
        return selectedPlayer;
    }

    public void setSelectedPlayer(Photo selectedPlayer) {
        this.selectedPlayer = selectedPlayer;
    }

   
    public List<Photo> getImages() {
        return images;
    }

    public List<Photo> getPlayers() {
        return images;
    }
}

showPhoto.xhtml

<!DOCTYPE html PUBLIC “-//W3C//DTD XHTML 1.0 Transitional//EN” “http://www.w3.org/TR/xhtml1/DTD/xhtml1-transitional.dtd”>
<html xmlns=”http://www.w3.org/1999/xhtml”
xmlns:f=”http://java.sun.com/jsf/core”
xmlns:h=”http://java.sun.com/jsf/html”
xmlns:ui=”http://java.sun.com/jsf/facelets”
xmlns:p=”http://primefaces.org/ui”
xmlns:c=”http://java.sun.com/jsp/jstl/core”>
<h:head>

</h:head>
<h:body>
<h:form>

<p:lightBox styleClass=”imagebox”>
<ui:repeat var=”image” value=”#{galleriaBean.images}”>
<h:outputLink value=”#{image.position}”>
<p:graphicImage value=”#{image.img}”
alt=”Image Description for #{image}” title=”#{image}” />
</h:outputLink>
</ui:repeat>

</p:lightBox>

</h:form>
</h:body>
</html>

l’output sarà:

ui:repeat JSF 2

ui:repeat è un tag  per visualizzare  una lista di oggetti in una tabella HTML.
Creare una classe User che contiene le informazioni da visualizzare:

User.java

package com;
public class User {
private String name;
private String surname;
public String getName() {
return name;
}
public void setName(String name) {
this.name = name;
}
public String getSurname() {
return surname;
}
public void setSurname(String surname) {
this.surname = surname;
}
}

Creare un backing bean

TableExampleBean

package com;

import java.util.ArrayList;
import java.util.List;

import javax.annotation.PostConstruct;
import javax.faces.bean.ManagedBean;
import javax.faces.bean.SessionScoped;

@ManagedBean
@SessionScoped
public class TableExampleBean {

private List<User> users;

@PostConstruct
public void init() {
users = new ArrayList<User>();

User user = new User();
user.setName(“Paperino”);
user.setSurname(“Rossi”);
users.add(user);

user = new User();
user.setName(“Pippo”);
user.setSurname(“Rossi”);
users.add(user);

user = new User();
user.setName(“Pluto”);
user.setSurname(“Rossi”);
users.add(user);

}

public List<User> getUsers() {
return users;
}

public void setUsers(List<User> users) {
this.users = users;
}

}

Creare la pagina xhtml contenente il tag

showUsers.xhtml

<!DOCTYPE html PUBLIC “-//W3C//DTD XHTML 1.0 Transitional//EN” “http://www.w3.org/TR/xhtml1/DTD/xhtml1-transitional.dtd”>
<html xmlns=”http://www.w3.org/1999/xhtml”
xmlns:f=”http://java.sun.com/jsf/core”
xmlns:h=”http://java.sun.com/jsf/html”
xmlns:ui=”http://java.sun.com/jsf/facelets”
xmlns:p=”http://primefaces.org/ui”
xmlns:c=”http://java.sun.com/jsp/jstl/core”>
<h:head>
</h:head>
<h:body>
<h:form>
 <table> <ui:repeat var=”user” value=”#{tableExampleBean.users}”> <tr> <td>#{user.name}</td> <td>#{user.surname}</td> </tr> </ui:repeat> </table>
</h:form>
</h:body>
</html>

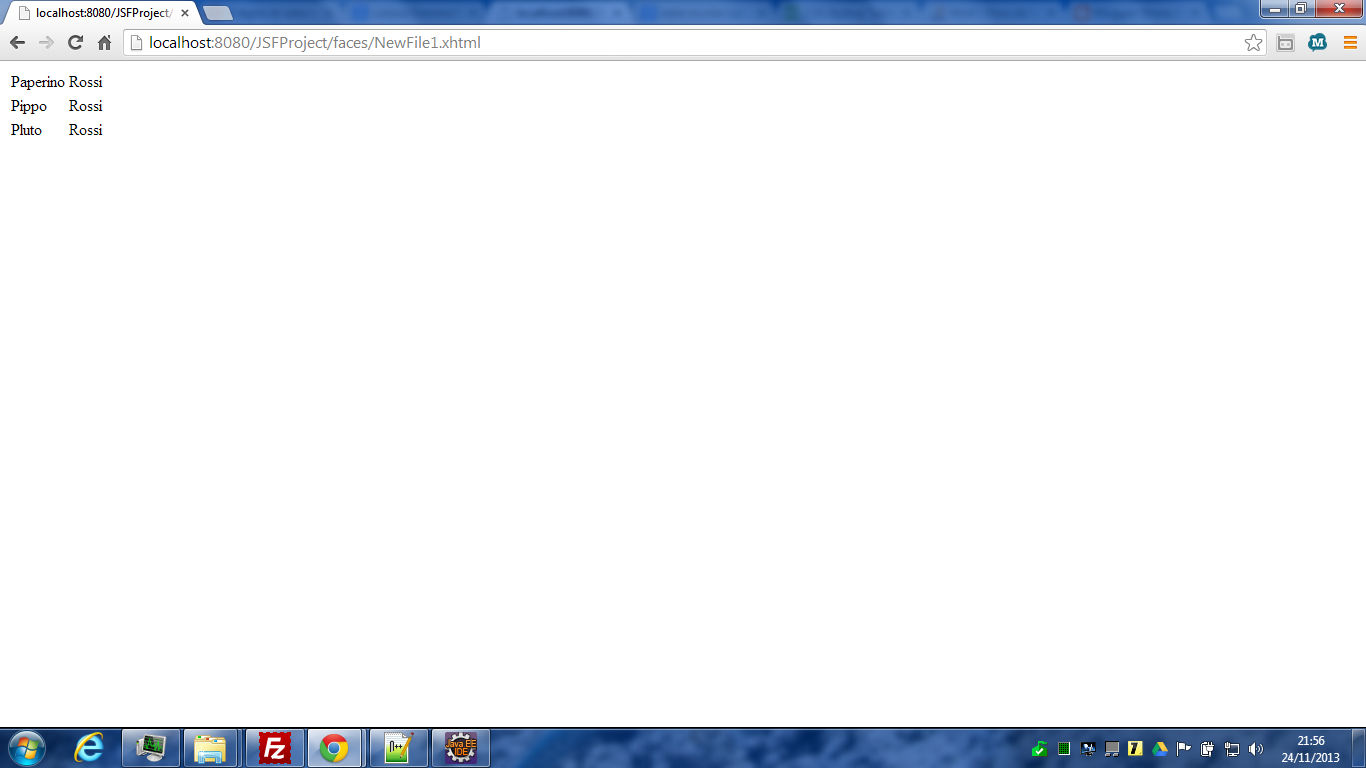
Output visualizzato:

h:dataTable JSF2

h:dataTable è un tag  per visualizzare  una lista di oggetti in una tabella HTML.
Creare una classe User che contiene le informazioni da visualizzare:

User.java

package com;
public class User {
private String name;
private String surname;
public String getName() {
return name;
}
public void setName(String name) {
this.name = name;
}
public String getSurname() {
return surname;
}
public void setSurname(String surname) {
this.surname = surname;
}
}

Creare un backing bean

TableExampleBean

package com;

import java.util.ArrayList;
import java.util.List;

import javax.annotation.PostConstruct;
import javax.faces.bean.ManagedBean;
import javax.faces.bean.SessionScoped;

@ManagedBean
@SessionScoped
public class TableExampleBean {

private List<User> users;

@PostConstruct
public void init() {
users = new ArrayList<User>();

User user = new User();
user.setName(“Paperino”);
user.setSurname(“Rossi”);
users.add(user);

user = new User();
user.setName(“Pippo”);
user.setSurname(“Rossi”);
users.add(user);

user = new User();
user.setName(“Pluto”);
user.setSurname(“Rossi”);
users.add(user);

}

public List<User> getUsers() {
return users;
}

public void setUsers(List<User> users) {
this.users = users;
}

}

Creare la pagina xhtml contenente il tag

showUsers.xhtml

<!DOCTYPE html PUBLIC “-//W3C//DTD XHTML 1.0 Transitional//EN” “http://www.w3.org/TR/xhtml1/DTD/xhtml1-transitional.dtd”>
<html xmlns=”http://www.w3.org/1999/xhtml”
xmlns:f=”http://java.sun.com/jsf/core”
xmlns:h=”http://java.sun.com/jsf/html”
xmlns:ui=”http://java.sun.com/jsf/facelets”
xmlns:p=”http://primefaces.org/ui”
xmlns:c=”http://java.sun.com/jsp/jstl/core”>
<h:head>
</h:head>
<h:body>
<h:form>
<h:dataTable var=”user” value=”#{tableExampleBean.users}”>
<h:column>
<h:outputText value=”#{user.name}” />
</h:column>
<h:column>
<h:outputText value=”#{user.surname}” />
</h:column>
</h:dataTable>
</h:form>
</h:body>
</html>

Output visualizzato:

Raspberry XBMC Setup

Inserire la scheda SD nel lettore.
Scaricare da qui   l’installer per windows.
Scompattare il file e cliccare sul file “setup.exe”.
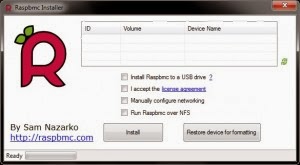
Apparirà questa schermata:

Selezionare “I accept the license….” e cliccare su install.
La scheda SD ora è completa.
Inserire la scheda SD nel raspberry e collegare mouse tastiera rete e televisione.
Ci vorrà qualche minuto per completare l’installazione.
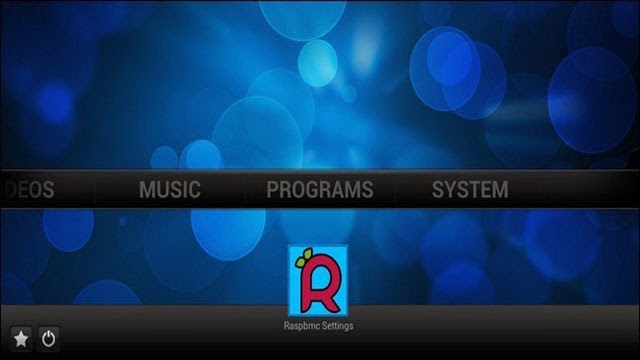
L’XBMC si presenterà così:

Per settare la lingua andare su Appearance–>Settings e selezionare il tab International, selezionare la lingua desiderata.
Si possono aggiungere molti add-ons, anche per poter vedere direttamente i video di youtube.

Per trasferire i file dal PC al raspberry io ho usato un client FTP FileZilla 

cliccare  su “gestione siti”:

selezionare “nuovo sito”, inserire l’IP del raspberry (System–>System info–>Network), come protocollo mettere “SFTP”.

User: pi
Password: raspberry

ora si possono trasferire tutti i file che si vuole direttamente dal PC.
Andare in Video–>File–>Aggiungi Video–>Esplora–>Root System e selezionare la cartella in cui si trovano i film copiati dal PC.

Per accedere via web dal PC l’xbmc, inserire nel browser l’IP del raspberry.

Selezionare Remote e si aprirà una console di controllo

Volendo si può evitare di mettere tastiera e mouse e controllare tutto dal PC.